Sewing for Beginners: 4 Easy Projects and Tips
- Apr 27, 2022
- 7 min read
Updated: Mar 26

Video Link: 4 Easy Sewing Projects For Beginners
*This post may contain affiliate links, which means I may receive a small commission, at no cost to you, if you make a purchase through the link*
Since all the projects I’ll be working on will be on stretch fabric, here are a couple things you need to know:


First you should change your needle to a ballpoint needle, stretch needle, or jersey knit needle depending on your fabric. For me, I used a stretch needle the whole time and had to issues.
The stitch I’m using for most of the video is a stretch stitch, it looks like a lightning symbol, or a more narrow and diagonal zigzag stitch. I used this stitch to sew all my seams together and to hem any edges. If you don’t have a stretch stitch, you can use a zigzag stitch!
You’ll see me using a walking foot attachment on my machine. I like to switch to a walking foot when sewing with stretchy materials because it really holds the layers in place and prevents it from stretching while I sew.
I did serge some of my seams before sewing the next but since knit fabric doesn’t unravel you can leave your edges raw if you wanted to!
Tube Top

The first simple DIY I’m gonna show you how to make is a tube top! I purchased this 4 way stretch ribbed knit fabric and to figure out my measurements. I measured the top of my chest, and then measured how long I wanted my tube top to be. Mine is going to be more of a bandeau crop top so I can keep the shape as simple as possible for this project. But if you want a more fitted top, you can angle the shape down to fit your waist which will give you two side seams to sew. The method I’m doing is literally going to be a boxy tube top that will have one side seam. Since the fabric is super stretchy, I took out 5 inches from that measurement so it can hug my body properly. So if my measurement is 30 inches, I only need my top to be 25 inches in circumference, but including seam allowance will be 26 inches. This measurement will vary depending on how stretchy your fabric is so give yourself extra room to work with until you fit it on yourself first. With my fabric on fold I marked out 13 inches across, which is half of 26, and then marked how long my top will be which was 8 inches with seam allowance. I’m cutting a lining layer because I want a thicker tube top, but if you want to simplify this project even more you can just do one layer. Sew the side seam of the tube top closed. This is what it looks like now, and if you’re only sewing a one layer tube top, all you have to do is hem the top and bottom and you’re finished!
Since mine has a lining though, I’m going to face the two layers right sides together and sew along the the top This is what the top looks like so far after under stitching the lining side down. And now to close up the bottom two layers, I’m going to evenly line the edges up and pin them together. then I sewed the bottom using the overlock stitch on my sewing machine since it already has the matching thread color. After overlocking the edges, I can fold over the edge 1 time and hem it with a stretch stitch. And we’re finished!
Elastic Band Shorts

The next easy sewing project are elastic band shorts which I’ll be making out of this dope tie dye fabric that matches the tube top! With my fabric on fold, I go ahead and fold it in half again. Next grab a pair of shorts or sweatpants you have at home, fold it in half as well, and line up the sides of the shorts along the fold of the fabric. If you don’t have enough fabric to do this double fold fabric method, just open the fabric back up and cut your folded shorts out one layer at a time. With the side seams of my shorts lined up on the fold, I draw a straight line across the top of the shorts, and I left additional fabric above because I need to add an additional inch to make it higher waisted, and then on top of that I added another 2 inches for the waist band. The next line you need to mark is how long you want your shorts to be. I measured mine from my waist down to above my knees, and it was 18 inches long. Draw a line across at that marking.


Next, trace out your shorts and make sure to add seam allowance while doing so. Then cut it out! When you unfold the fabric you should have two pieces that look like this. Fold each piece in half, right sides together, and sew the inner leg seam closed. Next, pin the crotch seam right sides together and sew it closed. It should look like a giant u shape! Lastly, I marked 1 and a half inches along the top of the shorts making sure it will fit the size of my waistband, and then folded the top of the shorts over and hemmed. Just make sure to leave a small opening to insert your elastic afterwards. The size of my elastic band is my waist measurement - 2 inches. But if you’re still unsure just leave your elastic band long until its inserted in the shorts. Then you can try it on and decide how tight it should be before trimming it. To insert the elastic, use a safety pin and weave it through the waistband until it comes out the other side. Then stretch out the waistband to sew the opening closed. And there you have it, a super simple pair of shorts that can be customized to your liking! Since I used knit fabric, I could just leave the bottom un-hemmed and I prefer it to look like that.

Bat Wing Shirt

The next easy sewing project is a loose fitted bat wing shirt! This was my most favorite things to make when I first learned how to sew and I honestly still love them so much! With the same tie dye fabric, grab a t-shirt you have at home that you like the fit of. I already have one that has the perfect looseness I want, but honestly any loose t-shirt will work. And again, if the width of your fabric isn’t wide enough to fit your shirt, just unfold the fabric and cut your pieces out individually.


Lay your shirt down on the fabric and trace the under arm seam and curve it into the side seam. We’re getting rid of the sleeves so there’s 1 less thing to sew! Then decide how long you want your top to be, Since the one I’m tracing is cropped, I’m just going to extend it a little more so its not as short. And lastly mark one line for the sleeve and shoulder seam, and mark the back neckline. You could mark all of this on fold, unlike me but you definitely should cut it on fold so both sides are even. Unfold the shirt and look at that! Such a cool simple batwing design. I just need to shorten the front neckline which could also be adjusted after you’re done sewing if you need to see what it looks like on first. The best part about this shirt is that there’s only 4 seams to sew, 2 shoulder seams and 2 side seams! And we’re finished! Here’s the complete matching set! Did you notice my logo on the shorts and the cute smiley cloud icon I added onto the top? I’m obsessed with this entire look!
Scrunchie

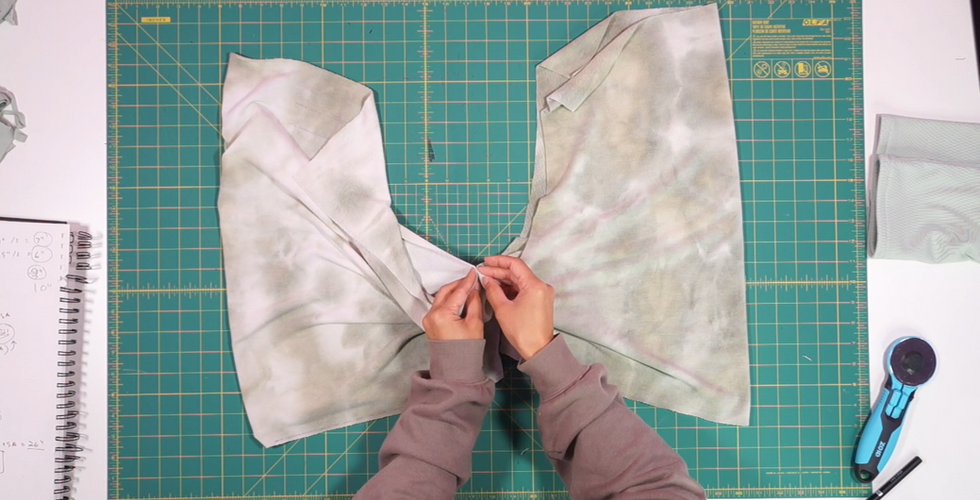
The last easy and quick sewing project you can make is a scrunchie! You can either use a hair tie you have at home or cut a piece of elastic the size of a hair tie. I’m going to make both versions to show you using the two fabrics! For the tie dye fabric I’m going to do the elastic band version, and cut a strip of fabric that was about 5 inches wide and 24 inches long. Then I’m going to fold it in half and sew the open side closed. For the hair tie version, I also cut a strip of fabric 5 inches wide, but only made it 18 inches long to just see the difference in scrunchiness. The longer your strip the more bunched it’ll look for sure!


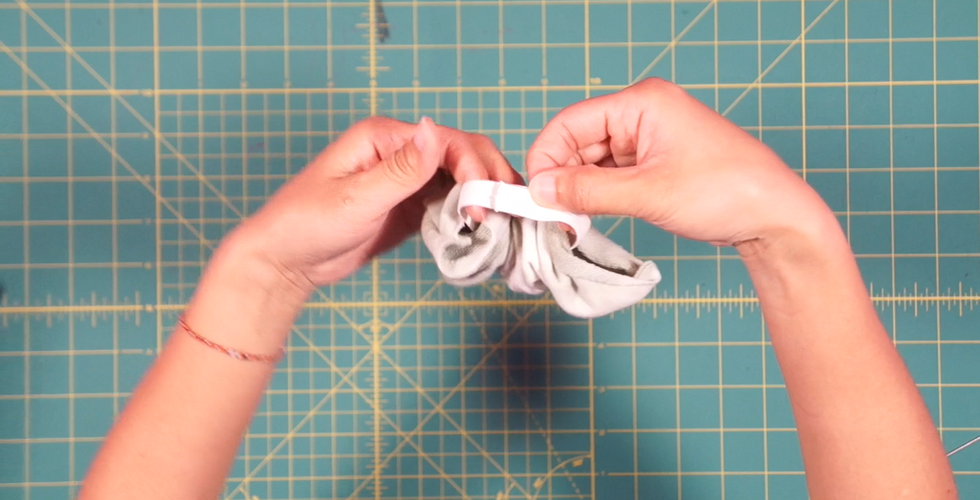
To sew it together, sandwich the hair tie in between the fabric and then pull the fabric out so you can sew along the entire edge. It looks confusing but it’s pretty straight forward once you try it out. Trim the seam allowance down by half so its not so bulky and then flip the strip right sides out. For the tie dye fabric, after sewing the open side closed, turn the strip right sides out as well, and then slide the elastic band in. Then sew the ends of the elastic or tie it together and now to close up the opening, you can either fold the raw edges of both sides under, and hand sew it closed, or you can just topstitch it closed which is what I’m going to do. It’s a really small area to be sewing on the machine but just take your time and make sure to continue rotating the scrunchie as you sew. Lifting the presser foot up when rotating is also helpful. And that’s it! I love that all of these projects are everyday items that can be worn by anyone! And if you really want to you can whip them all out in less than a day!
Make sure to check out my Must Have Sewing Supplies. You can also find the items I listed above through the link.


Comments